This post contains affiliate links. If you make a purchase through these links, I may earn a commission at no extra cost to you.”
With Online stores spending projected to grow even further in the coming years, launching an online store has never been more crucial.
Unfortunately, nearly50% of potential sales are lost simply because shoppers can’t find what they’re looking for on websites. Additionally, 62% of customers actively seek more engaging and entertaining online shopping experiences. This makes having an optimized online store essential to your business success.
WooCommerce, the open-source ecommerce plugin powered by WordPress.com, offers an ideal solution to launch an online store. Not only will it give you complete ownership of your store’s content and data, but it will also connect you to a global marketplace where trusted developers help build powerful, flexible online stores. With WooCommerce, you can create and launch online stores for physical products, digital goods, memberships, courses, and bookings. All from a single platform.
While the average ecommerce conversion rate hovers around 2%, a well-optimized store can significantly outperform that benchmark. this WooCommerce setup guide walks you through everything – from installation to customization, so you can create an optimized shopping experience that converts visitors into customers.
Getting Started with WooCommerce
Starting or optimizing an online store
WooCommerce transforms your WordPress.com site into a fully functional online store in just a few clicks. Whether you’re a beginner or an experienced developer, this powerful plugin provides everything needed to launch an online store quickly and efficiently.
What Is WooCommerce and Why Choose It?
WooCommerce is a free, open-source ecommerce plugin built specifically for WordPress.com. It manages essential store functions such as inventory control, secure payments, and shipping integrations.
Unlike many hosted ecommerce platforms, WooCommerce gives you complete ownership of your store and customer data. Its modular framework allows you to extend functionality with plugins and extensions, making it adaptable to virtually any business model.
Key reasons to choose WooCommerce include:
- Free core functionality (with optional paid extensions)
- Unlimited customization through open-source development
- A familiar interface for WordPress users
- Scalability from small shops to enterprise-level stores
Installing the WooCommerce Plugin on WordPress
WooCommerce is only available on WordPress.com Premium plans, allowing users to launch a fully hosted store without managing their own hosting or installations.
Installing WooCommerce takes only a few minutes:
- Log in to your WordPress dashboard
- Go to Plugins → Add New
- Search for WooCommerce
- Click Install Now, then Activate
Once activated, the WooCommerce Setup Wizard launches automatically. It guides you through basic store configuration, product types, and essential features. no technical expertise required.
Starting or optimizing an online store
After installing WooCommerce, it’s time to configure the core settings that define how customers interact with your store and complete purchases.
Configuring Store Details and Currency
Navigate to WooCommerce → Settings → General to enter your store’s address. This information affects both tax calculations and shipping rates.
In the same section, define the countries you sell and ship to. Under Currency Options, choose your currency, currency symbol placement, and decimal settings. Once you begin selling, changing currency can be complex, so choose carefully.
Adding Products and Categories
To add your first product, go to Products → Add New. While a product name and price are sufficient for a basic listing, detailed descriptions, images, and attributes significantly improve user experience and search visibility.
Organize products using categories and subcategories. For example, a clothing store might use “Shirts” as a parent category, with “Short-Sleeve” and “Long-Sleeve” as subcategories. Clear organization helps customers navigate your store intuitively.
Setting Up Tax and Shipping Options
Enable taxes under WooCommerce → Settings → General. This activates the Tax tab, where you can define how prices are displayed and configure tax rates based on location.
Shipping is configured using shipping zones, which define geographic areas and determine available shipping methods at checkout. Always arrange zones from the smallest to the largest regions to ensure accurate matching.
Choosing a WooCommerce-Compatible Theme
Choose a theme built specifically for WooCommerce to ensure compatibility with product pages, checkout functionality, and mobile responsiveness.
Lightweight themes such as Astra, OceanWP, and Storefront (WooCommerce’s official theme) offer excellent performance, clean design, and easy customization without requiring technical skills.
Customizing and Extending Your Store
Once your foundation is in place, you can enhance functionality and improve user experience. WooCommerce’s true strength lies in its extensibility.
Using WooCommerce Extensions and Plugins
WooCommerce extensions allow you to add advanced features. For example:
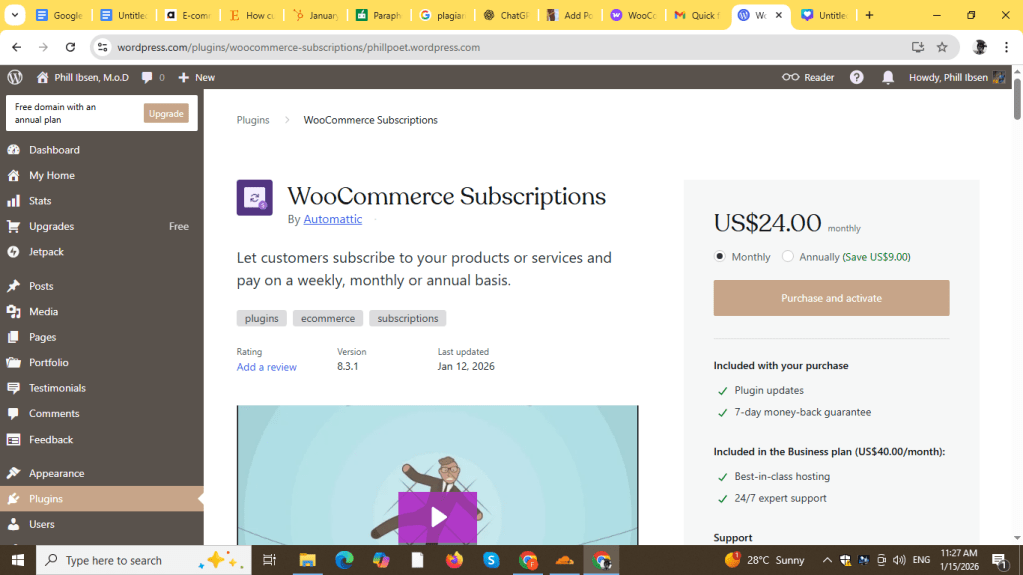
- WooCommerce Subscriptions enables recurring payments and memberships
- Product Bundles lets you create kits and custom product configurations
- CartFlows transforms the default checkout into optimized sales funnels with order bumps and upsells
These tools can significantly increase conversions and average order value.
Optimizing Product Pages and Checkout Flow
To simplify checkout:
- Remove non-essential fields (e.g., Company Name for B2C)
- Make phone numbers optional
- Enable guest checkout
- Offer express checkout options
Setting Up Payment Gateways (Stripe and PayPal)
To enable Stripe, go to WooCommerce → Settings → Payments and click Complete Setup. Stripe allows you to accept credit cards, Apple Pay, Google Pay, and buy-now-pay-later options.
For PayPal, install WooCommerce PayPal Payments from Plugins → Add New. After activation, click Activate PayPal Payments to connect your account and enable digital wallets and alternative payment methods.
Creating a User-Friendly Navigation and Layout
Eye-tracking studies show users look first to the top-left area of a page. Place your primary navigation in the header, prioritizing important items on the left.
Effective navigation includes:
- Clear, descriptive menu labels
- Clickable top-level menu items
- Dropdown indicators
- Breadcrumb navigation
A logical navigation structure helps users find products faster and reduces frustration.
Launching and Managing Your Store
Before opening your store to the public, thorough testing and preparation are essential.

Testing Your Store Before Going Live
Use test or sandbox modes (such as Stripe’s test environment) to simulate purchases. Your testing checklist should include:
- Browsing key pages on desktop and mobile
- Completing checkout with multiple products
- Testing payment methods using test card numbers (e.g., 4242 4242 4242 4242 for Stripe)
- Confirming order and email notifications are sent correctly
Involving real users during testing can uncover usability issues you may miss. Once testing is complete, clear your site cache and prepare for launch.
Connecting to the WooCommerce Marketplace
To sell products on the WooCommerce Marketplace, follow these steps:
- Prepare thoroughly tested products that meet quality standards
- Submit detailed product documentation
- Pass security, functionality, and compatibility reviews
- Launch and provide ongoing customer support
The marketplace operates on a 70/30 revenue split, with 70% going to vendors.
Monitoring Performance with WooCommerce Analytics
WooCommerce Analytics provides insights through three main sections:
- Performance metrics (sales, orders, average order value)
- Charts for visual trend analysis
- Leaderboards showing top products, categories, and customers
You can export reports as CSV files for deeper analysis, with large reports processed in the background and emailed to you when ready.
Providing Customer Support and Managing Orders
The Customer Support for WooCommerce extension enables live chat directly within your store, improving customer engagement.
The Orders dashboard allows you to:
- View and manage all orders
- Update order statuses
- Add internal or customer-facing notes
- Process refunds efficiently
Efficient support and order management help build trust and long-term customer loyalty.
Conclusion
Launching your first WooCommerce store may feel overwhelming initially. However, following this step-by-step guide clarifies the process and makes it achievable. You now have the knowledge to transform a WordPress site into a high-performing ecommerce store.
Start small if needed—but think big. With WooCommerce’s flexibility and the strategies outlined here, you’re well equipped to create an online store that not only attracts visitors but converts them into loyal customers.

Leave a comment